PinRemote™ Instructions
Installing the PinRemote™ is very easy and takes under 5 minutes.
PinRemote™ Installation Instructions
(A non-PDF version appears below)
Operating instructions for the different models
Plain Text Install Directions
- Overview: PinRemote™ is inserted between the service switches and the cable that connects to the switches. It gets 12V power from the coin mechanism’s lighting connector. Installation typically takes under 5 minutes.
-
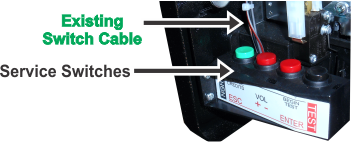
Behind the Coin Door:
Unplug your pinball machine.
Open the coin door and remove the service switches.
Disconnect the cable that connects to the switches.
-
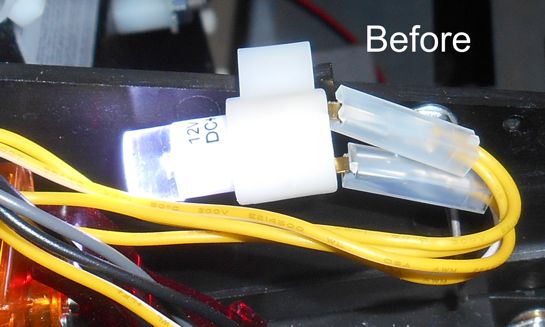
PinRemote™ Switch Connectors:
The data connectors can be connected on either end.
The way shown below is recommended.

-
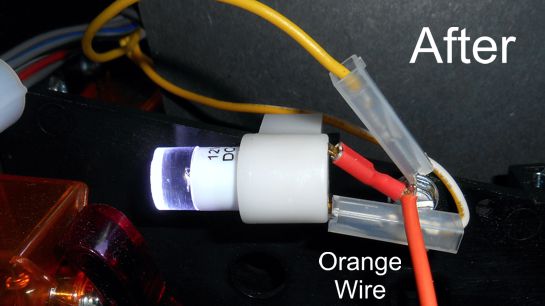
PinRemote™ Power Connector:
12V power is fed by tapping into the coin mechanism light connector:
Pull the top bulb connector and insert the double-ended quick connect at the end of the orange wire in between the bulb and the power wire:
-
Secure Circuit Board:
Reattach the service switches to the coin door. Attach the circuit board to some anchor points near the service switches using the enclosed Ty-Raps. Power on the machine and the "I'm Alive" LED should flash rythmically:

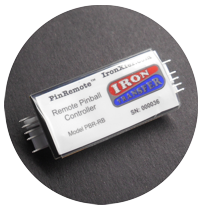
PinRemote™
Use your service buttons without a key! Press the 4 buttons using your cell phone or tablet.